RAEX Automated Curtain System Installation Video
P35 Curtain Rail Installation Manual
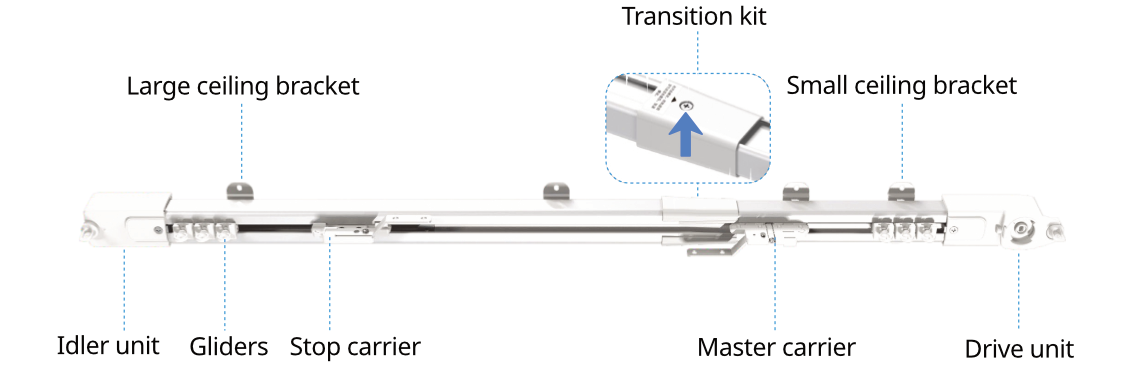
Curtain track components overview
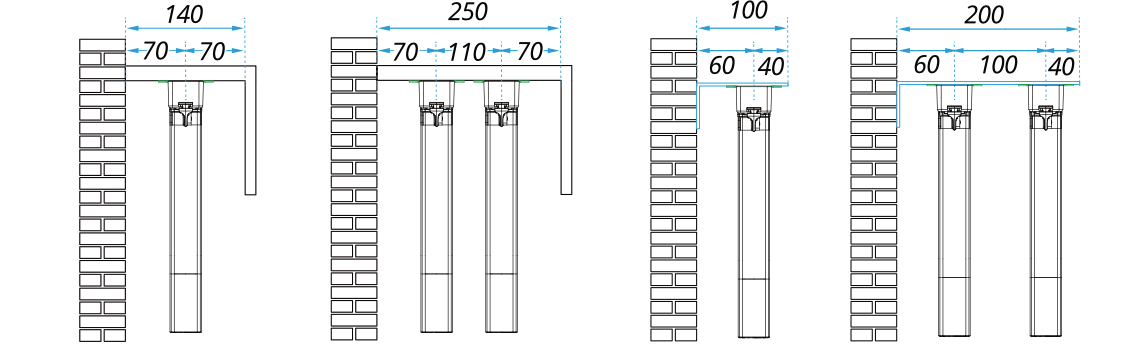
Mounting options and dimensions (units: mm)
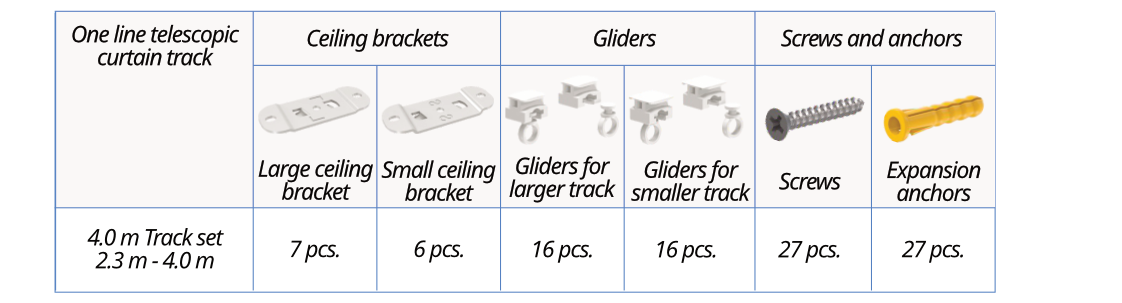
Package contents
Before installation, make sure that all required accessories and mounting tools are included in the package.
Adjust the track length
On the transition kit, loosen the Phillips screws, hold the track sections on both sides, and extend them to the required length.
Note: It is recommended to leave about 2 cm between the drive unit and the wall for proper operation.
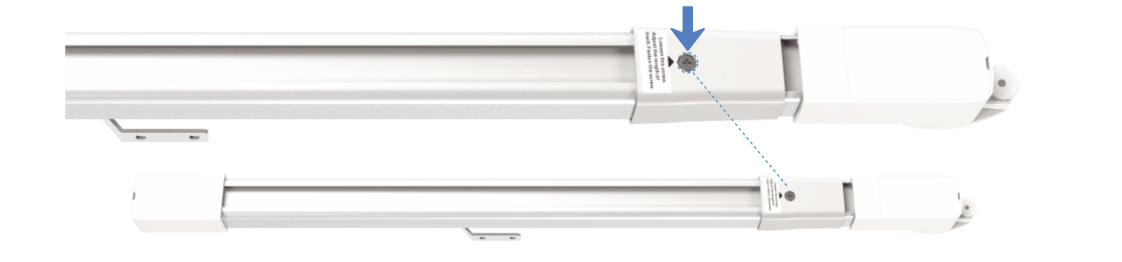
Tighten the Philips screw on the transition kit to complete the track adjustment.
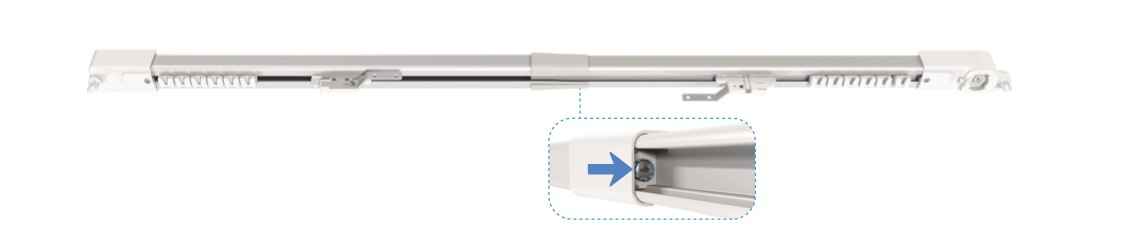
Adjust the gliders
Make sure the number of gliders matches the number of curtain hooks, and that both sides of the track have an equal number of gliders.
To add or remove gliders, loosen the screw and remove the small cover at the end of the track, as shown in the picture.

Attach the curtain rings
Attach the rings to the gliders by pressing them into the V-shaped slots until they click into place. Make sure they are locked and securely installed.

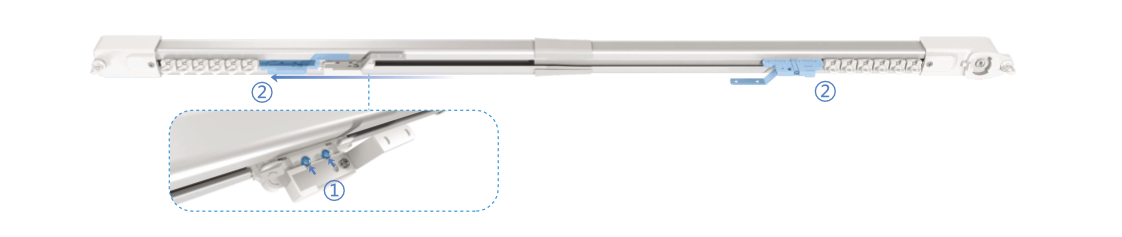
Adjust the carriers
- Loosen the upper screws on the stop carrier.
- Move each carrier towards its corresponding end of the track, then tighten the screws.
- Pull each carrier to make sure it moves smoothly along the track.
If a carrier moves too tightly or too loosely, it can be fine-tuned by loosening the screws on the side of the transition kit, then adjusting the carrier until it slides smoothly along the track.
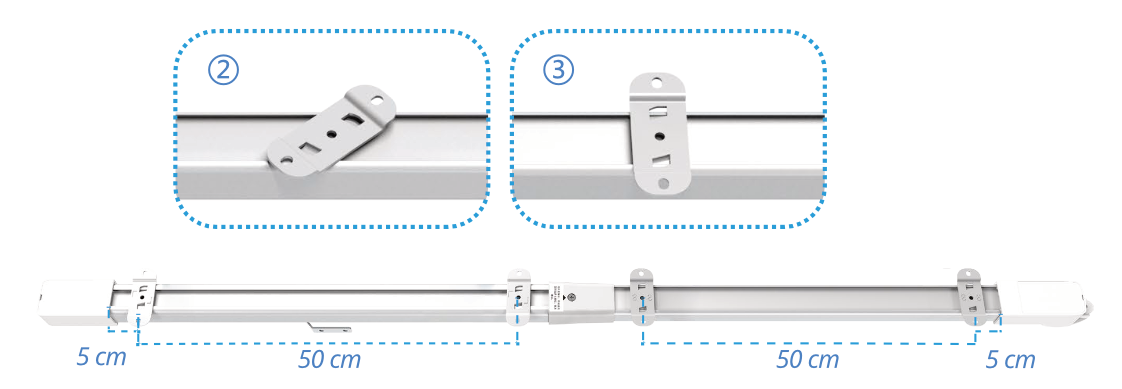
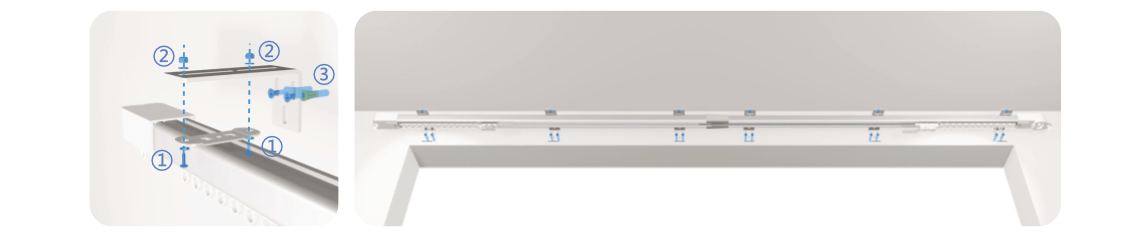
Install the ceiling brackets
To attach the brackets:
- Position it at a 45° angle on the top of the track as shown in Figure ②
- Rotate it until it clicks and locks securely in place; see Figure ③
- Using the transition kit as the center point, attach the remaining ceiling brackets at intervals of approximately 50 cm.
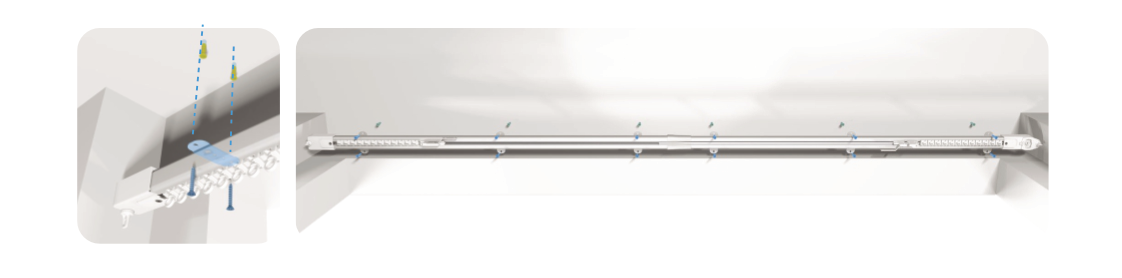
Ceiling mounting
For ceiling installation, use the brackets as a template to mark the screw holes on the ceiling. Then drill the holes, insert expansion anchors, and secure the track with screws.
If a curtain box is being installed, mark its position using the hole locations of the ceiling brackets, then secure the box with screws.
Wall mounting
For wall mounting, use the wall mounting brackets as a template to mark the screw holes on the wall.
Then, drill the holes, insert the expansion anchors, and secure the track to the wall with screws.
Note: The wall mounting brackets are not included in the package and should be purchased separately.
Single wall mounting
Double wall mounting
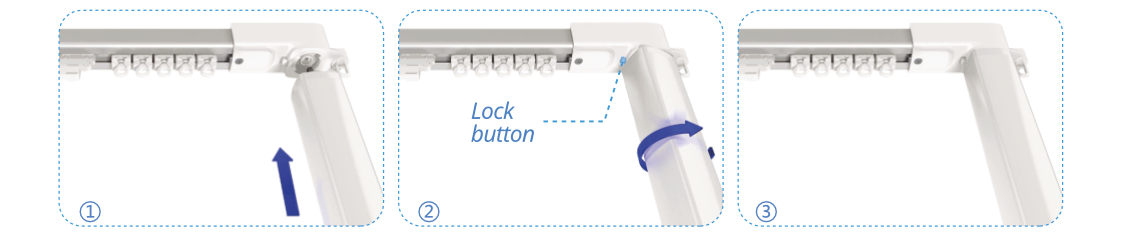
How to attach the motor
- Align the motor connector with the drive unit, then push the motor into place.
- When the lock button pops up, rotate the motor 90° to secure it.
- After you hear a click indicating the lock has engaged, release the motor. The motor is now installed.
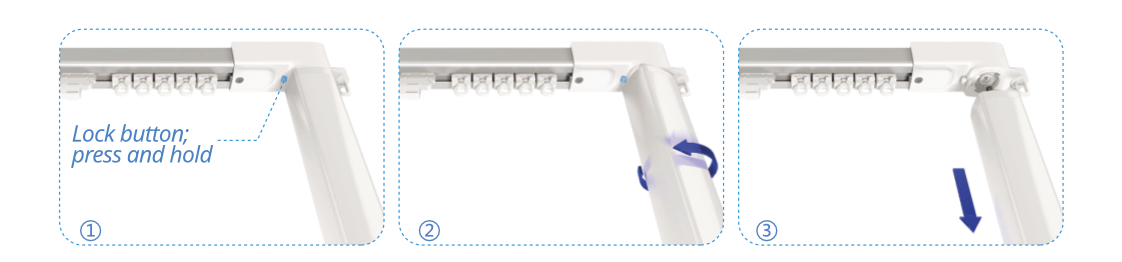
How to remove the motor
- Press and hold the lock button.
- While holding the lock button, rotate the motor at 90°.
- Gently remove the motor.